
What Are Garage Door 45 Degree Corners?
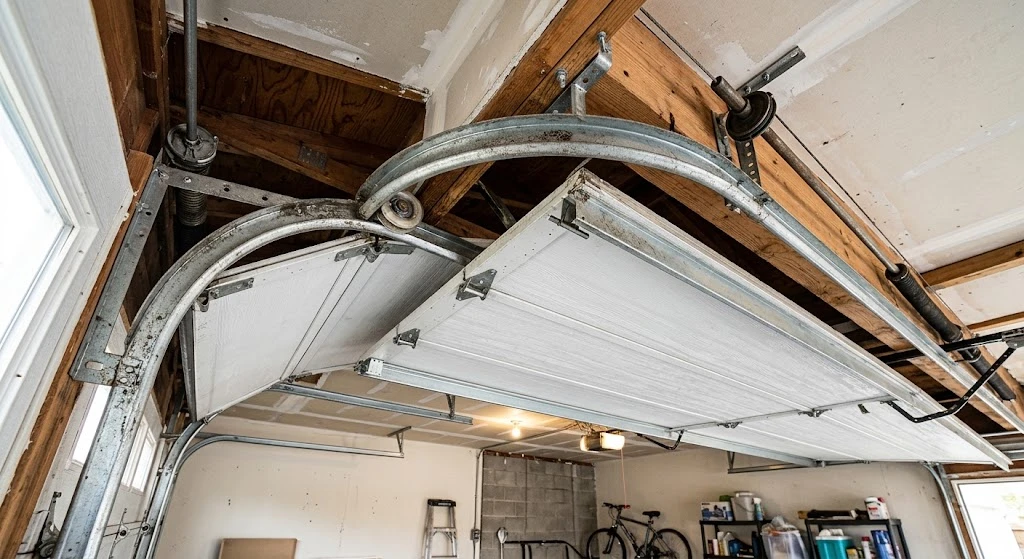
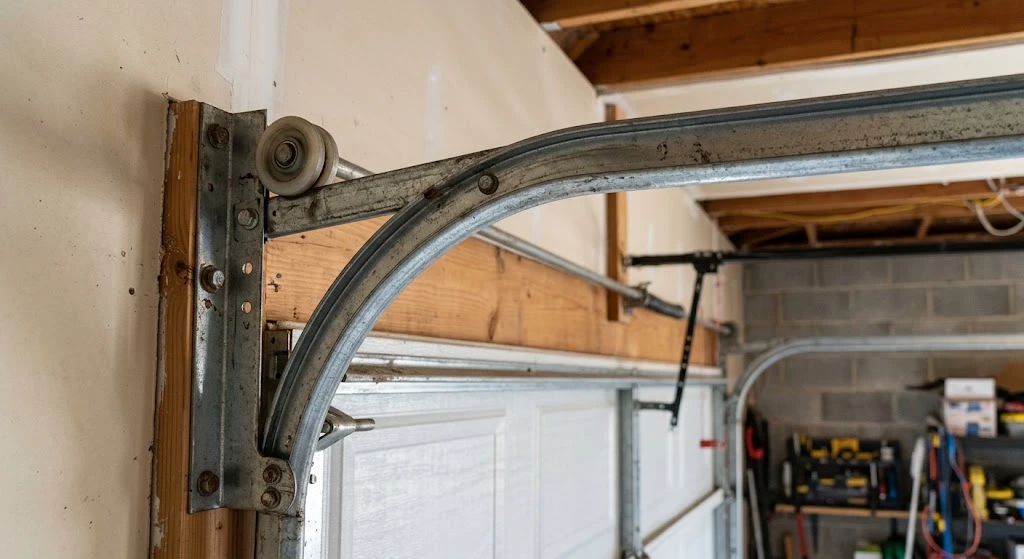
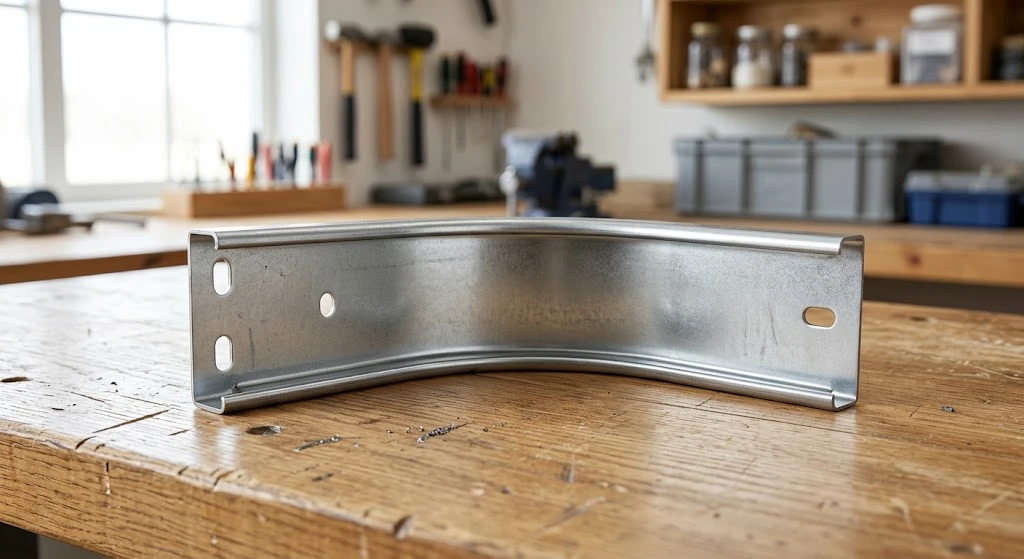
Garage door 45 degree corners are the curved track sections that transition the door panels from the vertical run (alongside the opening) to the horizontal run (along the ceiling). Without them, the door has nowhere to bend — it can’t travel from hanging vertically to lying flat overhead.
Every sectional garage door system needs these corner sections. They’re not optional hardware. If yours are bent, cracked, or the wrong radius, the door won’t open smoothly — and in some cases, won’t open at all.
This guide explains the different types of 45 degree corners, how to measure for the right ones, and how to replace them safely without calling a technician.
Short Answer: Garage door 45 degree corners are curved track sections that redirect door panels from vertical to horizontal travel. They come in standard radius sizes — 12″, 15″, and 23″ — matched to your door’s headroom clearance. Bent or broken corners cause binding, noise, and opener strain. Replacement costs $20–$80 for parts and takes 1–2 hours for a confident DIYer.
Types of 45 Degree Corners and How to Choose the Right One
Not all 45 degree corners are interchangeable. The radius — the curve measurement — must match your existing track system and your garage’s headroom. Using the wrong radius forces the door panels to bind in the curve, which damages rollers, hinges, and the opener drive system over time. Note that a larger radius needs MORE headroom, not less — true low-headroom clearance comes from a dual-track conversion kit and modified brackets, not from switching to a bigger radius corner.
| Corner Radius | Standard Headroom Required | Best For |
|---|---|---|
| 12″ radius (standard) | 10″–12″ headroom | Most residential garages with standard ceiling height |
| 15″ radius (standard, smoother operation) | 12″–14.25″ headroom | Standard garages wanting quieter door travel (needs MORE headroom than 12″, not less) |
| Low headroom conversion kit (dual-track, 12″ radius) | 4.5″–6″ headroom | Garages with low ceilings or limited clearance above the door |
| 23″ radius (high lift) | 20″+ headroom | High-lift track systems, commercial applications, tall garages |
The easiest way to confirm your radius: measure the existing corner from the center of the curve to the inner edge of the track. That measurement is your radius. If the old corner is too bent to measure, match the part number stamped on the track itself — most manufacturers stamp the radius directly on the metal.
How to Measure for Replacement 45 Degree Corners
Buying the wrong part is the most common mistake homeowners make. Take three measurements before ordering anything.
- Headroom clearance: Measure from the top of the door opening to the ceiling (or any obstruction above). This tells you which radius fits your space.
- Track width: Measure the inside width of the vertical track. Standard residential track is 2″ wide. Some Wayne Dalton and commercial systems use 3″ track — parts are not interchangeable.
- Track gauge: Standard residential track is made from 14-gauge or 16-gauge steel. Heavier doors need heavier-gauge corners. Check the track label or match the gauge of your existing hardware.
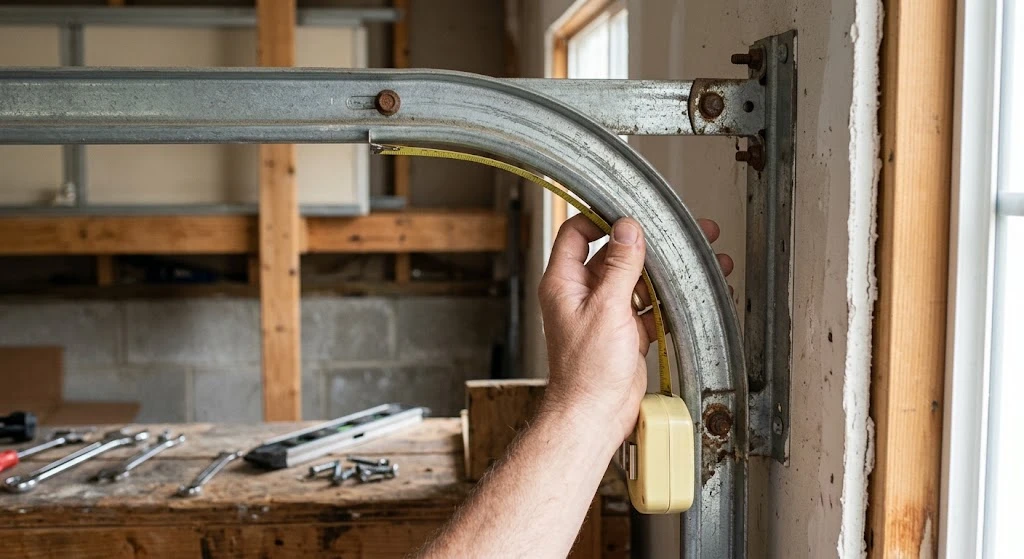
Also note whether your track is a one-piece or two-piece design. Two-piece corners bolt together at the curve and are easier to replace without disassembling the entire track system.
Signs Your 45 Degree Corners Need Replacement
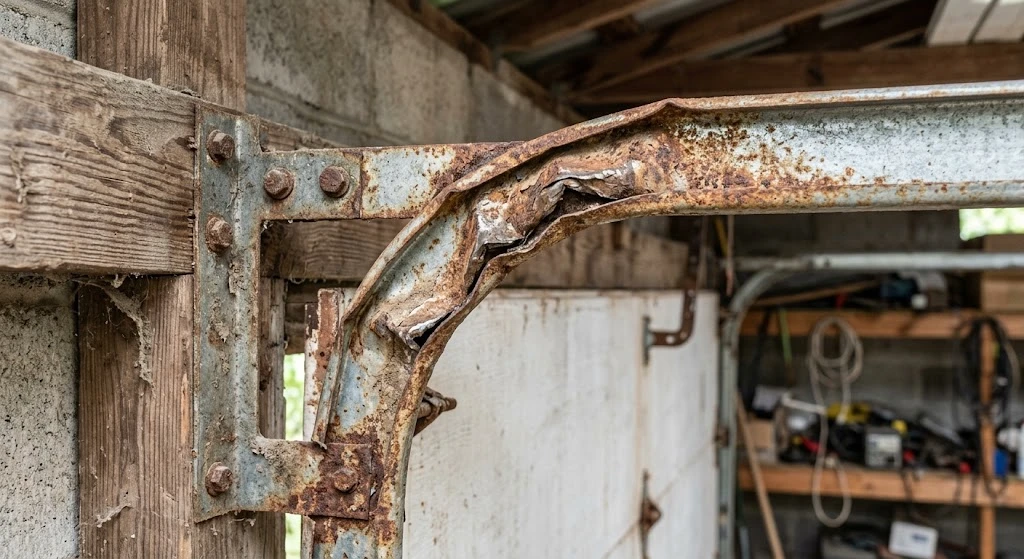
Worn or damaged corners give clear warning signs before they fail completely. Catch them early and replacement is a straightforward DIY job. Ignore them and you risk the door jumping the track, damaging panels, or straining the opener to the point of motor burnout.
| Symptom | Probable Cause | DIY Suitability | Safety Risk |
|---|---|---|---|
| Door jerks or hesitates at the top of travel | Bent corner forcing rollers out of smooth path | Yes — replace corners | Medium |
| Grinding or scraping noise near the top of the door | Roller catching on damaged corner edge | Yes — inspect and replace | Medium |
| Door visibly misaligned when fully open | Corner radius mismatch or severe bend | Yes — if springs are not involved | Medium |
| Opener straining or reversing unexpectedly | Increased resistance from damaged track curve | Yes — fix track first | Low |
| Visible crack or sharp bend in the corner section | Impact damage or metal fatigue | Yes — replace immediately | High if left unfixed |
How to Replace Garage Door 45 Degree Corners (Step by Step)
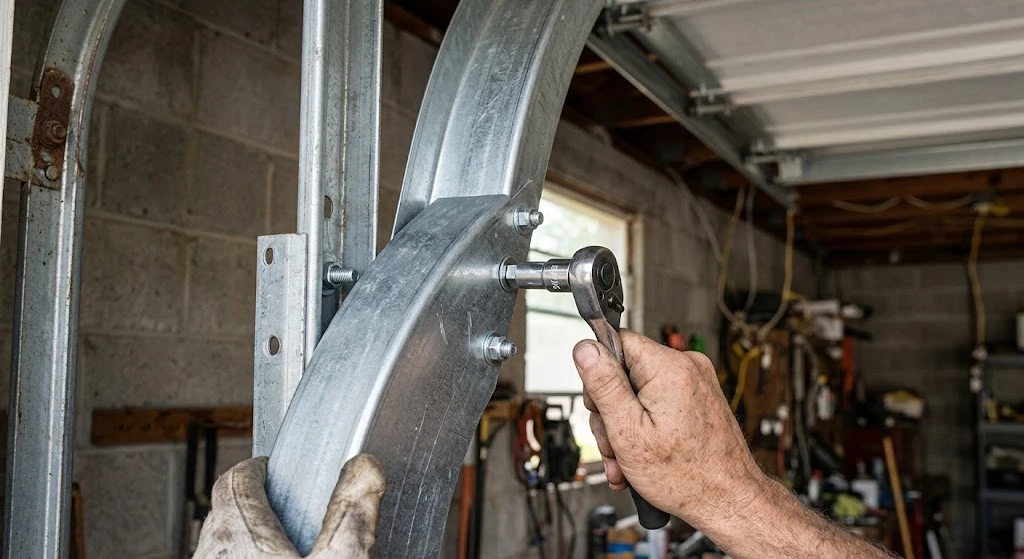
This is a manageable DIY repair for most homeowners. The only time you should stop and call a pro is if the torsion spring above the door is also damaged — never work near a loaded torsion spring without professional training.
- Disconnect the opener. Pull the red emergency release cord to disengage the trolley. This lets you move the door manually without the opener fighting you.
- Open the door fully and clamp it. Use two C-clamps or locking pliers on the vertical track just below the bottom roller. This holds the door up while you work on the corner sections.
- Remove the horizontal track. The horizontal track bolts to the corner bracket using two or three bolts. Remove them and let the horizontal section rest on the door panels temporarily.
- Unbolt the corner from the vertical track. The corner section connects to the vertical track with bolts at the top. Remove these carefully — the track will be loose once disconnected.
- Remove the old corner. Slide the rollers out of the track to free the corner section completely.
- Install the new corner. Slide rollers back in, bolt the corner to the vertical track, then reattach the horizontal track. Snug the bolts but don’t fully torque yet.
- Check alignment. Remove the clamps and manually operate the door a few times. The door should travel smoothly through the curve. Then tighten all bolts to specification — typically 25–30 ft-lbs for standard residential hardware.
- Reconnect the opener and test. Reattach the trolley and run the opener through several full cycles. Listen for any grinding or hesitation at the curve.
| Field | Detail |
|---|---|
| Repair Time | 1–2 hours |
| Tools Needed | Socket wrench, C-clamps, ladder, replacement corner section |
| DIY Suitability | Safe for DIY if springs are intact and undamaged |
| Safety Risk | Medium — door weight and spring tension require caution |
| Parts Cost | $20–$80 depending on radius and gauge |
| Professional Cost | $100–$200 including labor |
Where to Buy Replacement 45 Degree Corners
Most home improvement stores stock standard 12″ radius corners in 2″ track width. For low-headroom conversion kits or high-lift (23″) corners, you’ll usually need to order online or through a garage door parts supplier.
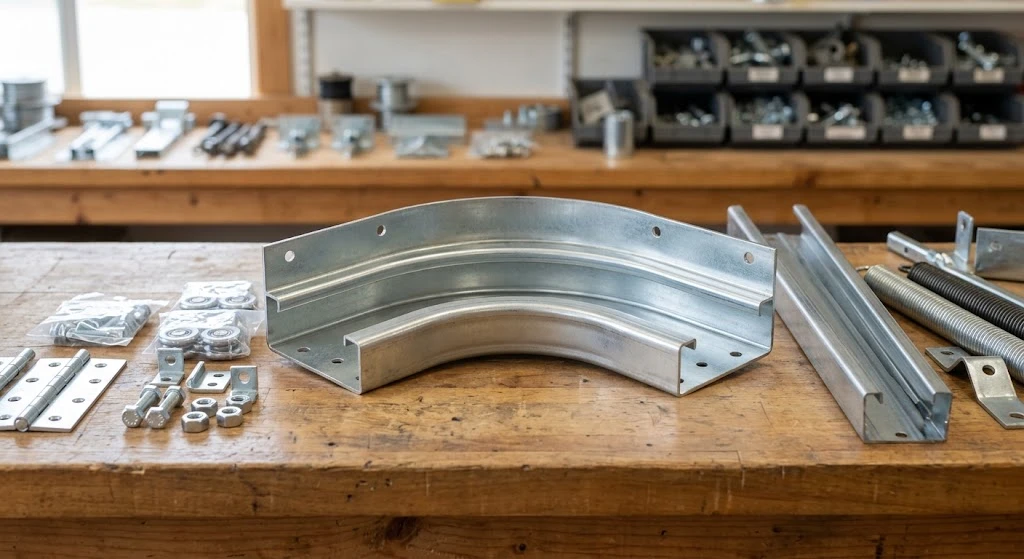
When ordering, bring the part number from your existing track or specify: radius, track width, track gauge, and whether you need a left-side, right-side, or pair. Corners are handed — left and right are mirror images and not interchangeable.
A universal horizontal curved track pair (12 inch radius) covers most residential doors, including Amarr, Clopay, Chi, Overhead Door, and Wayne Dalton — the same curved corner section this article is about. Note that Ideal Door and genuine Clopay-branded hardware are sold through dealers and Menards/Home Depot rather than Amazon, so a universal track is the more practical option for most homeowners. Double check your radius (12″ or 15″) before ordering, since the two are not interchangeable.
Frequently Asked Questions
Can I use a 12″ corner if my garage has low headroom?
No. A 12″ radius corner requires at least 10″–12″ of headroom above the door opening. If your clearance is less than that, the door panels will collide with the ceiling as they travel through the curve. Measure your headroom first and select a dual-track low-headroom conversion kit for tight clearances, not a larger-radius corner, since a bigger radius actually needs more headroom, not less.
Do I need to replace both corners at the same time?
Not always, but it’s worth inspecting both while you have the track apart. If one corner has bent or cracked from age or impact, the other is under the same stress and often close behind. Replacing both as a pair saves a second repair job within a year or two.
My door jumped the track at the corner — is that a corner problem?
Usually yes. When a roller leaves the track at the curve, it means the corner is bent, the radius doesn’t match the roller size, or a roller is broken. Inspect the corner section and all rollers before reinstalling the door. A damaged roller on a good corner can cause the same problem — check both before ordering parts.
Are garage door corner sections universal across brands?
No. Track dimensions vary by manufacturer. Clopay, Wayne Dalton, Amarr, and Overhead Door all use slightly different track profiles. Mixing brands causes binding and premature wear. Always match the replacement corner to your existing track brand and gauge, or replace the entire track system as a matched set.
In our experience answering questions about track repairs, homeowners often replace the corner but skip inspecting the rollers riding through it, then wonder why the new corner wears out just as fast as the old one.
How long do 45 degree corners typically last?
Well-maintained steel corners last 15–25 years under normal residential use. Corners in humid climates or coastal areas may rust and weaken after 8–12 years. Lubricating the track annually and keeping rollers in good condition significantly extends corner life by reducing the impact forces each roller applies to the curve.
Related Guides
For our garage door sizing and dimension guides, see 16 vs 18 Foot Garage Door: Which Size Is Best, 7 Foot vs 8 Foot Garage Door Comparison, 8′ Garage Door Header Size Guide, Ceiling Height for 10 Ft Garage Door, How Heavy Is a Double Garage Door?, How Much Does a 16×7 Garage Door Weigh?, What Size Header Do I Need for a 16 Foot Garage Door? and What Size Garage Door Opener Do You Need for 18 Foot Door?. For our installation and framing guides, see How to Install a Garage Door in a Cinder Block Wall and How to Reinforce a Garage Door for an Opener.